Microgreens are a delicious way to add local, nutritious greens to your diet year-round so why not learn to grow them from home? It doesn't get any more local than that! We'll even walk you through it!
Step 1: Gather Supplies

Before you can start your microgreens, you will need to gather some supplies. You can use what you have available, but here are the supplies we have found useful:
- A tray or shallow container to grow microgreens in (glass, plastic, or a fancy, two-tier microgreen tray setup: one with drainage holes and one without for bottom watering)
- A growing medium, such as organic soil
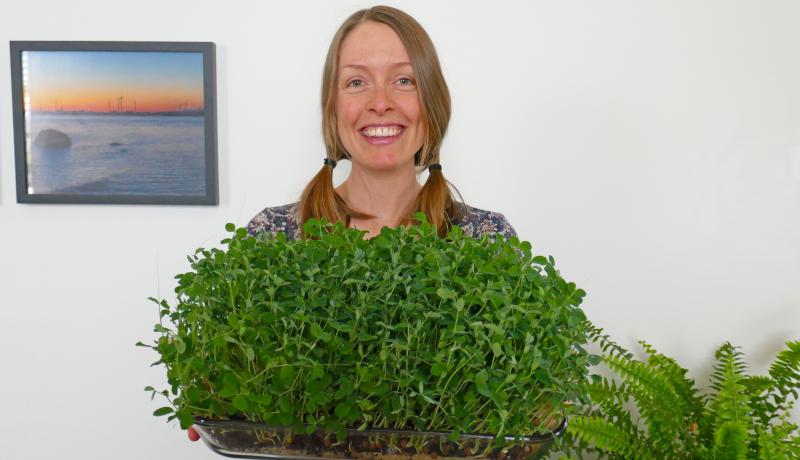
- Microgreen seeds (we highly recommend starting with pea shoots - they are versatile, mould resistant, and will make you feel like a pro microgreen grower right away!)
- A dish cloth (to cover the seeds while they germinate)
- A spray bottle (to lightly mist your microgreens while they germinate)
- A watering can (for once your microgreens take off!)
- Optional: A grow light (we have been growing microgreens indoors all winter long with a T5 HO grow light)
Step 2: Soak your Seeds

Some seeds will do best if you soak them first. Be sure to read the instructions that accompany your seeds so you know how long to soak your seeds. Our pea shoot seeds came with instructions to soak the seeds for 6-12 hours.
To start, we lightly fill the bottom of the tray we are using with seeds. (PRO TIP: For pea seeds we leave some extra space because as the seeds soak they will get bigger! The general rule here is, the bigger the seed, the more they will increase in size when soaked. For smaller seeds we cover most of the bottom of the tray as they won't increase in size nearly as much.)
Then, we cover the seeds with room temperature water and allow them to soak for time suggested on the instructions. Ww generally like to soak them closer to the maximum soaking time to give them a head start.
Once the seeds are finished soaking, we rinse and drain the seeds.
Step 3: Germinate your Seeds


Now it's time for the seeds to have a nice long nap somewhere dark!
Line the growing tray with a thin layer of soil (approximately 1-1.5cm deep) and spread your seeds in a single layer on top of the soil. Use your spray bottle to mist your seeds well (so the seeds and top of the soil are damp but not wet). Then, cover the tray with a tea towel and find a safe space where your seeds can stay for a few days while they are germinating.
Remember to check your seeds each day (3-4x times throughout the day is ideal) and mist them, as needed, to keep the soil moist. Be sure to remember to cover them back up with a tea towel once you're done misting them. Continue this process for the number of days specified by your seeds package (for peas it's about 4-5 days) or until the sprouts have reached about 1.5-2cm in height.
Once the seeds have reached this height they will probably be yellow. Don't worry if this is the case... they will "green up" once they get some light!
Step 4: Time to Grow

Once your germinated seeds have reached 1.5-2cm in height, it is time to move your tray somewhere with full light (e.g. up to 12 hours of light) but that doesn't get too hot (as you may need to water them more frequently). A sunny window ledge should work well.
We started growing microgreens in our apartment in the winter with a T5 HO light and have found it very effective. However, many people grow microgreens on window ledges or outside without any trouble!
Continue to check on your microgreens 2-3 times per day. For the first few days under light, we usually continue to mist the microgreens (so the soil stays damp, not wet) as the root systems develop. Once the root systems develop and the pea shoots get larger, we switch to watering carefully with a watering can because the pea shoots get thirstier! Alternatively, you can try bottom watering at this point if you are using a dual microgreen tray set up (i.e. one with holes, one without)
Continue this for a few days or until your pea shoots look ready to eat!
Step 5: Time to Harvest

Once your pea shoots are looking ready to eat, use a pair of scissors to cut off the pea shoots.
If you're not planning on eating them all at once, move them directly into an airtight container and store them in the fridge (PRO TIP: do not wash them, they will stay fresher, longer!). Alternatively, you can cut them as you need them and add them straight to your meal!
FUN FACT: Some larger seeds, like peas, will grow back a second (or sometimes even a third!) time! Try continuing to water what remains of your recent harvest for a few days to see if they will grow again. If not, add the used seeds and soil to your backyard compost pile to create nutrients for your soil!
Please log in or register to leave a comment.